Installation
There are two ways to install GASsma. Both give you the same library and the same features.
| Method | Best for |
|---|---|
| CLI (local development) | Type-safe development with editor completion and a build step |
| GAS script editor | Small scripts, or trying things out without a local environment |
CLI (local development)
npx gassma bootstrap sets up a clasp + esbuild + TypeScript + GASsma environment in one command. No prior installation is needed.
npx gassma bootstrap my-app
The steps are covered in the Quickstart.
To add GASsma to an existing project, install the package and then create the schema and config files with gassma init.
npm i gassma
npx gassma init
For the full list of commands, see CLI Commands.
GAS script editor
First, after opening Apps Script, click the "+" button in the Libraries section.
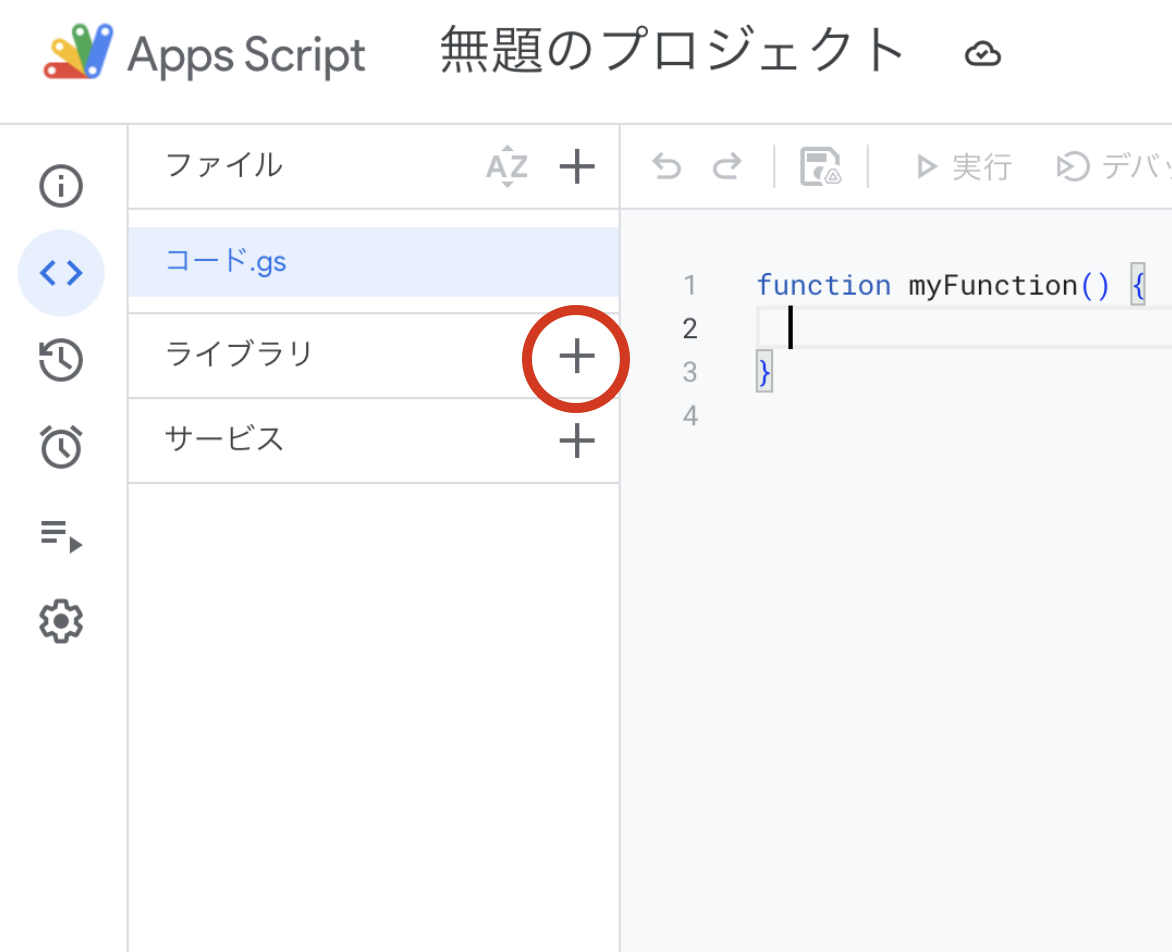
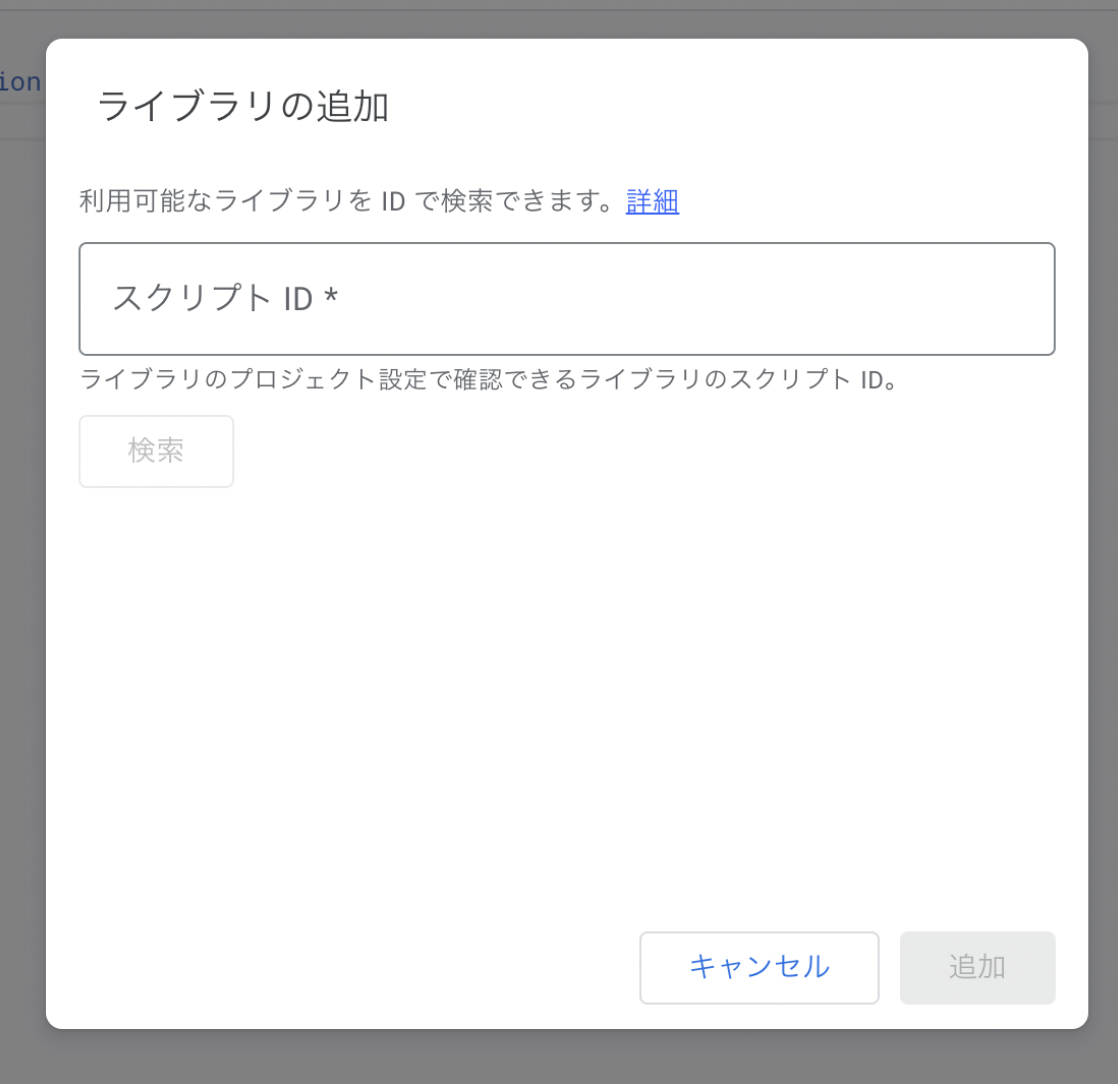
A dialog like the one below will appear. Enter the following in the "Script ID" field and press the search button.
1ZVuWMUYs4hVKDCcP3nVw74AY48VqLm50wRceKIQLFKL0wf4Hyou-FIBH
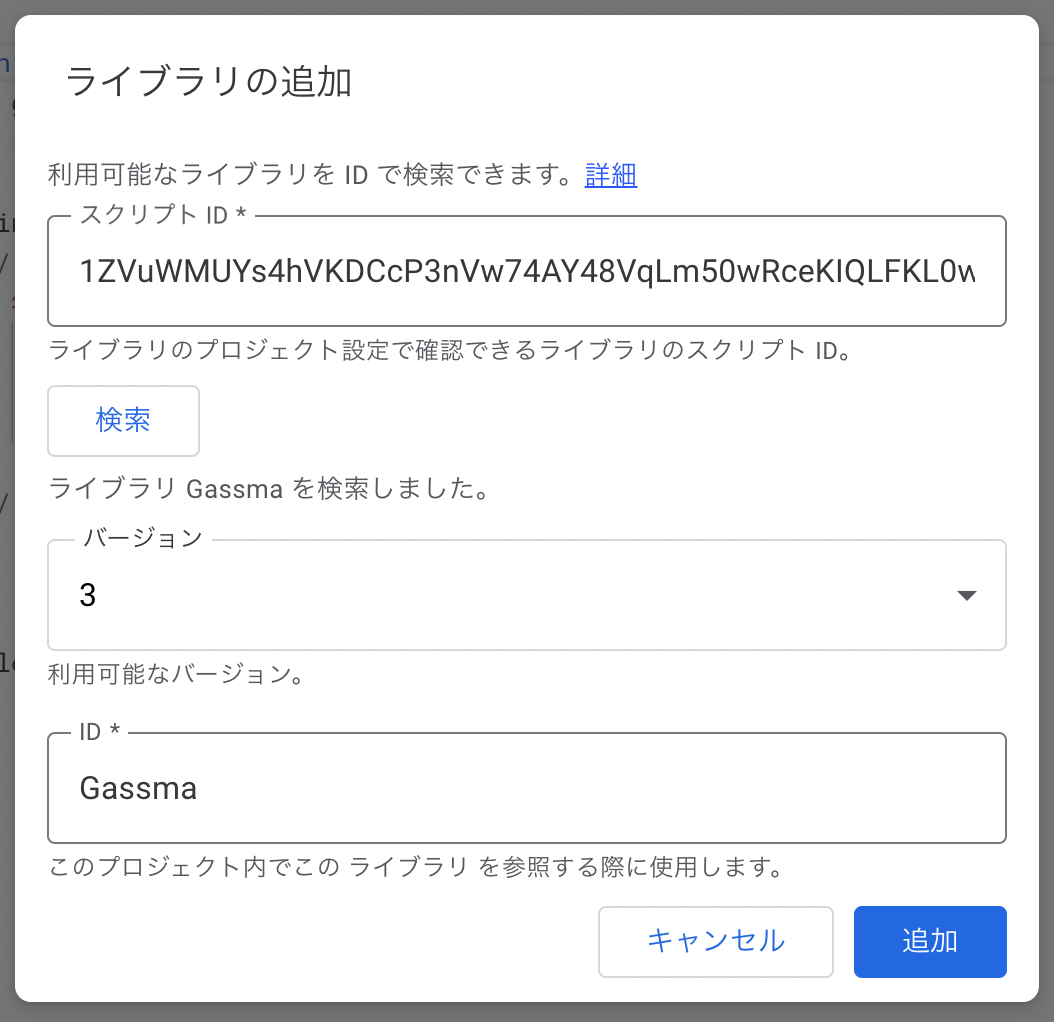
The following screen will appear. Press the "Add" button.
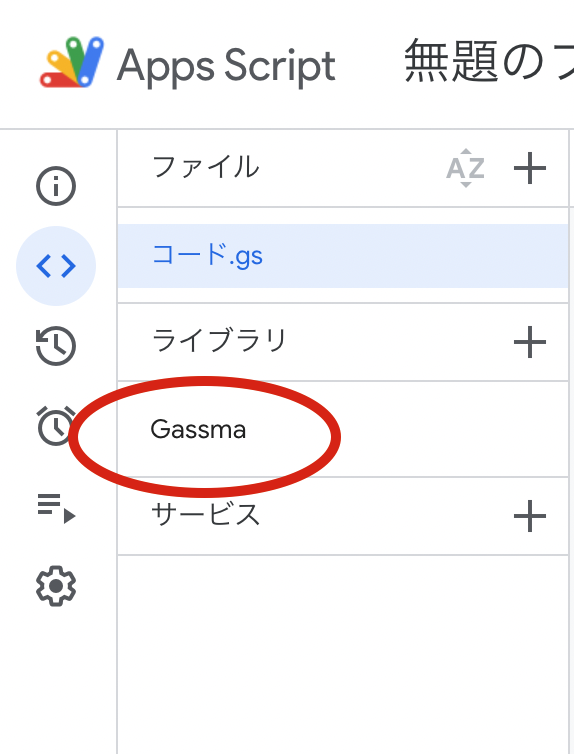
If "Gassma" appears in the Libraries section, you're all set!
For how to write code, see Using the GAS Editor.
When you use npx gassma bootstrap, this library entry is added for you automatically (it is written into dist/appsscript.json).